New PC Build
- Brad Wegner Sr
- Dec 31, 2024
- 4 min read

For the past few years I've been wanting to build a dedicated Lab Server for my house. Something I can have up and running and connect to whenever I'd have time to explore a topology or feature of interest. Several years ago I purchased and built a Ryzen 9 based system to act as a daily driver and operate in a dual-boot mode to serve this functionality.
My first go was with a separate drive configured for the $300 version of Cisco CML. It became apparent after a short while, that this would not be sufficient, as I needed access to run images that were not supported by CML. I then went with a ESXi thinking that would be the magic bullet, and in many ways it was, but having to boot into the hypervisor, and access via a laptop became so inconvenient that I simply gave up on the dual-boot config.
Then I found myself choosing to take a new role with another organization, it was time to turn in my company-owned assets, and I found myself in a role that more advisory in nature when it came to technology. With the change in responsibilities along with employers, I, for the most part, discontinued all serious lab efforts.
Recent events, such as the ratification of 802.11be, have sparked a new interest for me in terms of labbing, and as such, I have found it necessary to get back on the horse. After pricing out used server equipment (Holy Smokes it gets pricey!) I decided the best of action was to repurpose the 16-Core behemoth I had previously built and build a new daily driver that was capable of running my Aaronia V6 (Requires Intel Processing) and included a Wi-Fi7 card for testing as well.
With the decision to perform a new build made, I headed out to my favorite computer store with my buddy Phil to keep me company. After the purchase we headed to Phil's Ham Shack to complete the build.
Introducing the new build:
Corsair RM750e - This was mostly a price point decision. At $100 I got a fully modular PSU capable of handling my modest equipment needs.


The Corsair 5000D RGB has a lot of consideration for the builder around airflow, cable management, fan hubs, it's really got a lot to it. At $150 this was more than I've paid for a case in the past, but I do find that it has value at this price point.


Due to the selection of an Intel brand processor, I needed to choose a non-OEM CPU Cooler, for $130 the Lian Li Closed Loop product seemed to fit the bill. It looked to match the case, provide efficient cooling, and seemed to serve as a fitting introduction to liquid cooling technology. (I've only ever used cooling fans in my previous builds)

The CPU Cooler turned out to be quite large and encroached on the footprint of the motherboard. If you look closely, you can see the black standoffs just below the cooler, so we needed to make an adjustment to the fitment of the cooling fans. As the fans for the CPU Cooler blow across the radiator, when we moved the case fans, we made certain to orient them so that would be drawing air into the case, to then be exhausted out of the case and across the radiator.


I selected a middle of the road motherboard ensuring to include Wi-Fi7 and a 2.5G Ethernet port. My office is hard-wired at 1Gbps currently, but I am looking to make the move to multi-gig in the future. The motherboard pricing was, in my opinion ridiculous, and I sincerely wonder what makes these Intel boards so expensive comparative to AMD boards. At build-time Phil and I were both pleasantly surprised by the number of high-speed connections this motherboard had on offer.

We selected the Intel processor below because it was a great deal at this price point ($230). Had I not had the requirements for an Intel processor to make use of the Spectran V6, I would have likely gone with AMD, as that is what I am used to building. When installing these processors, care must be taken as there are many fine pins on the motherboard that can bend or break very easily. I recommend installing the processor (it has a keyed orientation) to the motherboard, before installing the motherboard. It may save you some heartache. Once you have the processor installed, make sure you install the CPU Cooler mounting plate on the back side of the motherboard before installing it in the case.

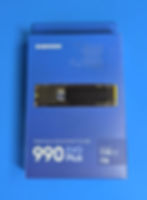
I selected a Gen 4 1TB NVMe SSD for Production. The Motherboard can host a number of M.2 cards so expansion is not of real concern for the intended workflow.
There was a sale on Crucial RAM and I decided to put more in than I thought I would ever need. I've been a fan of Micron for years, and when I've had the budget, I've gone with their products. For $150, 64GB of matched dual-channel DDR5 seemed like a no-brainer.

The install went neat and clean with only a few hiccups. The integrated cable management is a huge boon to this case and I must say is likely my favorite part to it.

The machine passed POST on the first attempt and took us to a BIOS setup page, from there we loaded a bootable flashdrive with Windows 11 Pro.
Later, I will add my 4060ti card to the kit to complete it and get the Spectran V6 connected. I will publish a separate post on the rebuild of the Ryzen 9 system I will be converting for the lab.